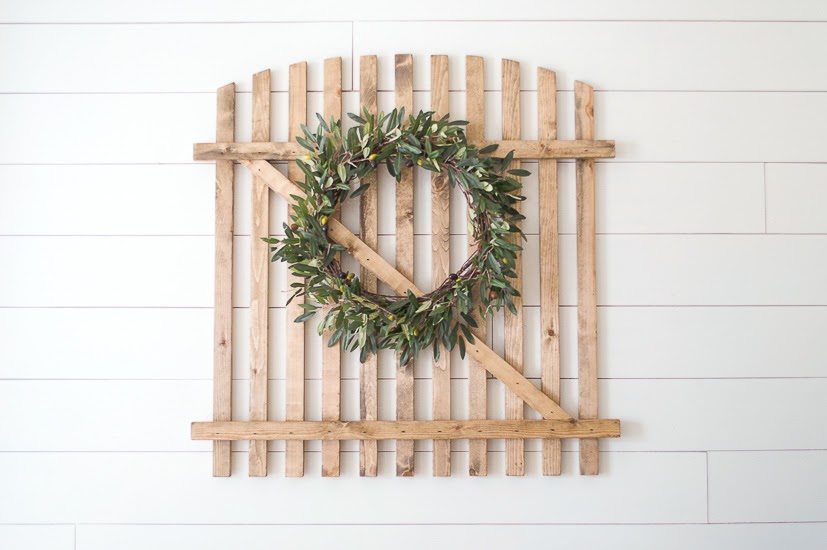
Wooden crafts always give an aesthetic look to home decor. Make your own ‘Old’ farmhouse gate wall hanging that gives a beautiful look to your room. Below are the steps courtesy of littleredbrickhouse.com
Place the 6 feet boards at a 1.5-inch distance from each other. Place 2 boards across them with the angles board in between. Assemble it with wood glue and nails.
Next, draw an arch on the top of the gate with a pencil.
Using a jigsaw, carefully cut out the arch
Sand the edges round to get rid of any obvious splinters from the fresh cuts.
Apply the stain of your choice to give the gate a smooth appearance.
Wait for the stain to dry up and add a leaf or flower wreath on it and the ‘Old’ Farmhouse Gate is ready to be hanged!
Wall hangings have always been used as a part of home decor. It increases the beauty of the area in which we hang the artifact. Let’s make a reversible wall hanging that can be changed according to your likes. Below are the steps courtesy of papernstitchblog.com
Take a 12-inch wood round and 12-inch wood square and mark the lines as shown in the above picture.
Cut the wooden circle along the middle line to create a perfect semi circle
Cut the wooden square along the 3 lines as shown in the above picture to create three rectangular pieces.
Next, drill the holes on the pieces as shown in the picture to put the strings into. 5 holes on the rectangular block and 2 at the bottom of the semicircle.
Use a copper wire to attach each piece together. Thread 4-6 inch pieces through each hole and twist until secure on the backside of the wall hanging.
Paint one side of the semicircle for the reversible effect and attach an eye hook to the very top of the wall hanging, so that it can be flipped over and hung with either side facing outward for two totally different looks.
You can hang the reversible wall hanging on any area of the wall and reverse it according to your mood.
All of us love having antique handicrafts in our homes. It gives that area of the house a lovely aesthetic look. The wood box centerpiece offers you the same effect. Below are the steps courtesy of lovegrowswild.com
First, cut all your 1 x 6 pieces and then drill pocket holes as shown above. The top two pieces are the short sides, the next two pieces with pocket holes in each corner are the long sides, and the bottom piece will be the bottom of the box.
Use 1 1/4″ screw and attach the short sides to the long sides through the pre-drilled pocket holes.
Drop the bottom piece inside the box you’ve created and add screws to secure it. Sand all the edges down smoothly and wipe the box to remove any dust.
Add a coat of light white stain on the box to give it a chippy white stain with a darker stain on the wood under it.
Chip off the white paint a little on the corners and distress the paint so that it appears to be old. This gives the box an antique look.
Add a drawer pull to each of the short sides. These can be available at a very low cost.
Add jars with any beautiful plants that you like and you’re good to go!
If you are looking for crafts to make your house look shiny, glitterball yarn ornaments are your best choice. Following are the steps to make one courtesy of onelittleproject.com
Cut around 15 to 20 pieces (2.5ft long) of yarn per ball ornament. The more yarn you use, the better your ornament will look. Mix your glue, water, and glitter in the disposal bowl. You can blow a balloon up and slowly let the air escape still you reach the right size. Hang the balloon on a kitchen cupboard or light holder above the dining table.
Now going to the messy and fun part, add one strain of yarn into the bowl of glue and sink it fully into the bowl and stir using the plastic fork. Find the end of the yarn, then run it through the fork as shown in the picture. Forks work so well to remove the excess glue. Carefully wrap the strain of yarn around the balloon and when you reach the end of the yarn, sink the next set of yarn into the bowl.
When you finish wrapping a strand of yarn, make sure you tuck the end under another piece of yarn so that it doesn’t fall down when you let go of it. Keep adding more glue-covered yarn in different directions until you are happy. You can leave the yarn ball hanging overnight to dry. Then make a small cut in the balloon, very close to the knot. When the balloon is deflated, you can pull it out from the yarn ball.
Tie a piece of string around the yarn, and the ball ornament is complete. You can make the glitterball yarn in various colors by using different colors of cotton yarn and matching color glitter.
These crafts are easy to make and inexpensive too. You can hang paper chains as festive party decorations, or you can just make them for fun. Kids will love the bright colors and the hours of fun. Given below are the steps courtesy of diynetwork.com.
Materials Required are colored cardstock, scissors, stapler, ruler.
Cut the cardstock into 16 strips of 1″ x 11″. Set aside two red strips for a larger top heart. Cut the rest of the strips in half (1″ x 5-1/2″).
Staple two strips of the same color together on one end. Form heart shape with the two unstapled ends of the first heart. Before stapling, tuck in two strips of another color for the next heart.
Staple all four strips to form the first heart and to start the second heart.
Continue steps until you have 14 hearts. Add the two long red strips to the top to create the larger red heart and your countdown Paper chain is ready.
The 3D effect of the kite popping off the page combined with the variety of colors makes this a gorgeous craft to display at home or school for others to admire. Following are the steps courtesy of fun365.orientaltrading.com.
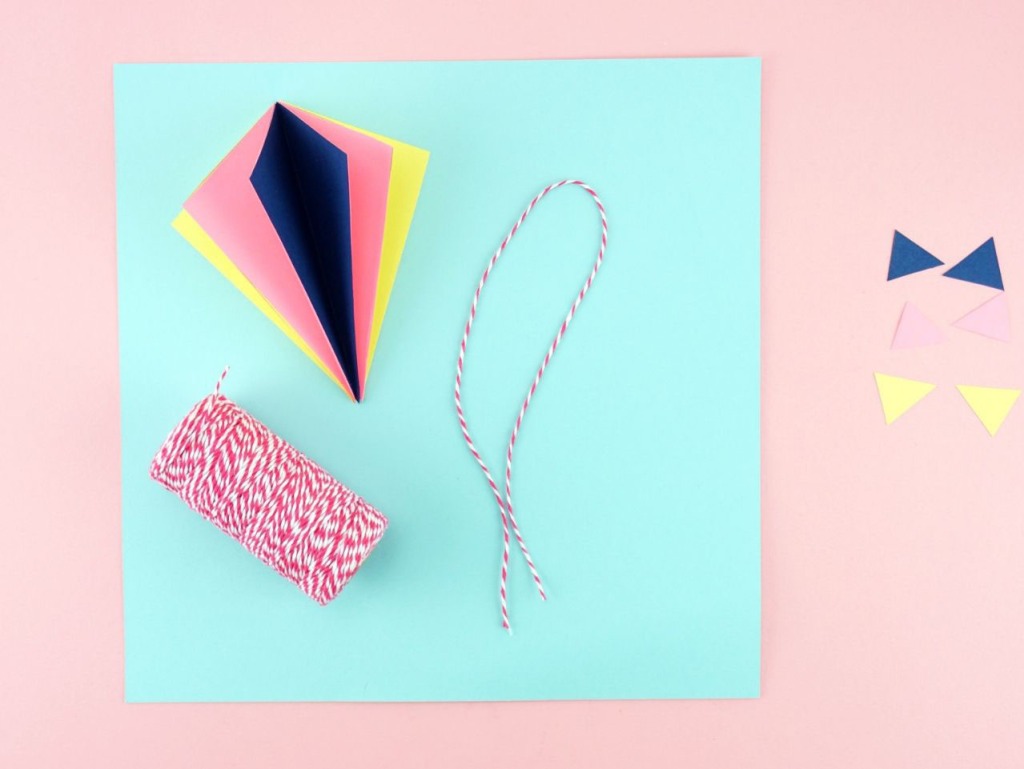
Materials required are: Full Color Spectrum Paper Pack, Elmer’s Tacky Glue, Twines, Scissors.
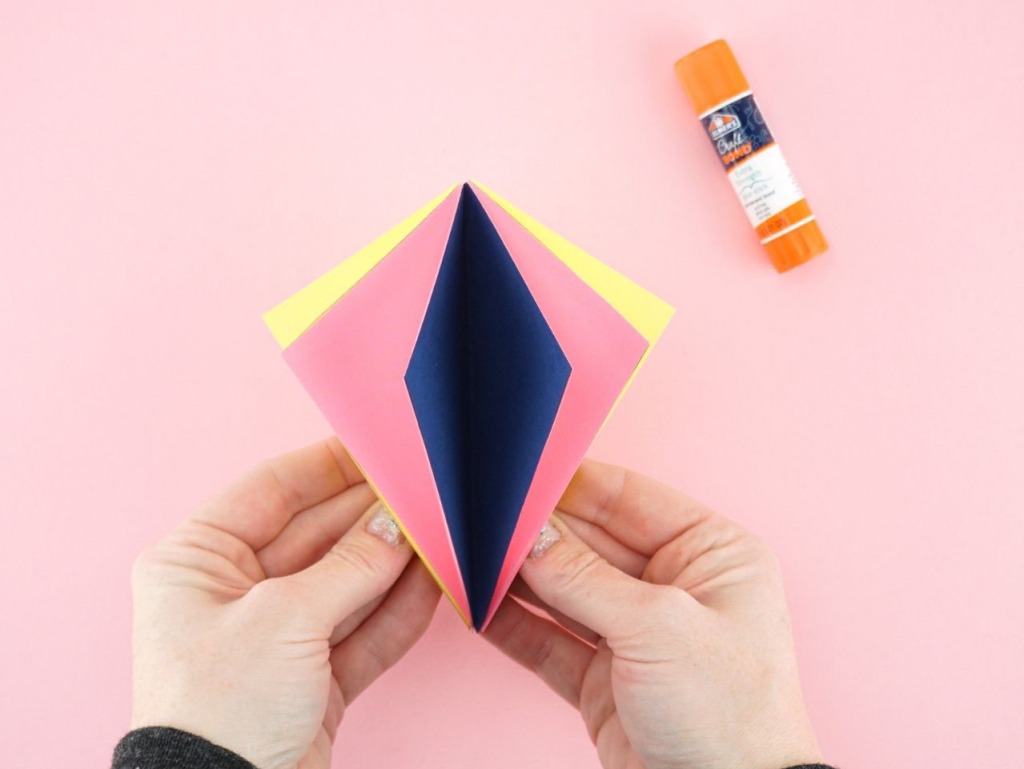
Cut out the kite shape using a template. Use it as a pattern and trace the shape five times on colored cardstock. Cut out each of the traced kite shapes. Then fold each of them in half length-wise.
Using an extra strength glue stick, add glue to one-half of one of the kites. Line up and place another kite half on the glue to attach them together. Repeat this step four more times to glue each of the kites together. After each of the kites are glued together, you will have a 3D kite shape.
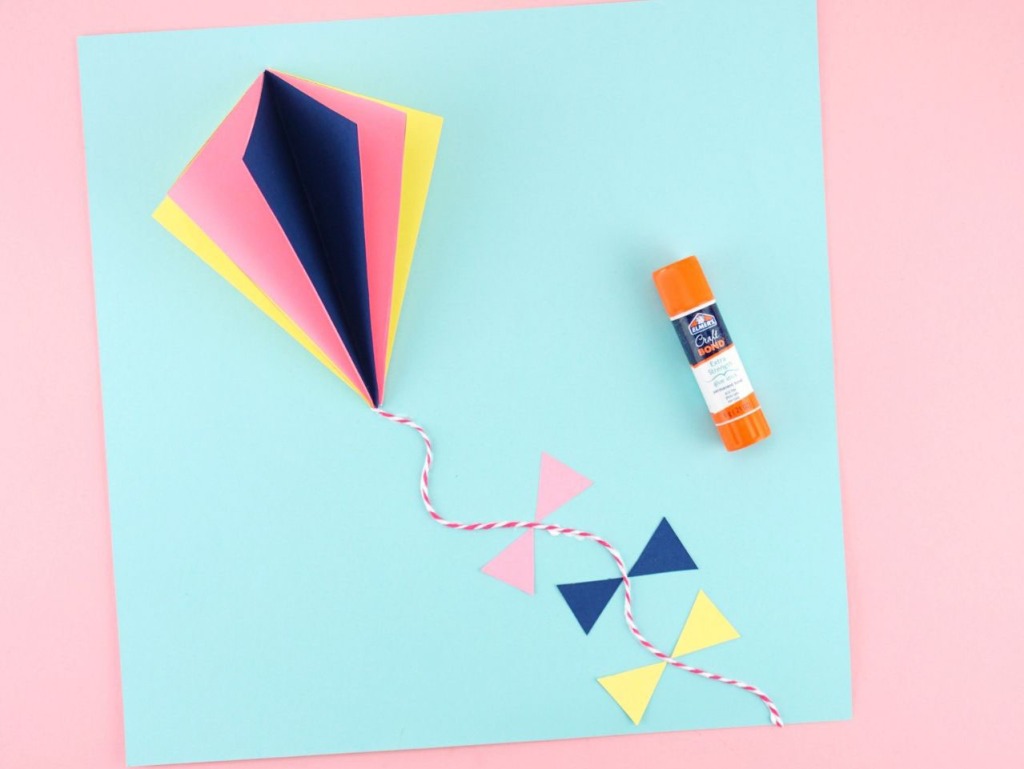
Cut out six small triangle shapes from your cardstock paper scraps for kite string bows. Set them aside. Add glue on the back of the 3D kite shape and glue it at the top corner of a piece of blue cardstock.
Cut a length of baker’s twine about 8-inches long. Add a line of tacky glue running from the bottom of the 3D kite to the bottom of your blue cardstock. Place your baker’s twine on the line of glue. Cut off any excess twine that hangs off the bottom of your cardstock. Use a glue stick to glue each of the small triangle pieces along the baker’s twine kite string to look like bows.
Cut out a few clouds from white cardstock. Then glue them on your blue cardstock on the sides of your 3D Kite Craft. Allow the glue on your paper craft to dry completely before handling your craft. This colorful paper craft will look stunning hung on display.
Make pretty butterflies with colorful cupcake liners, pipe cleaners and some fun stuff lying around your home. Below are the steps courtesy of firstpalette.com.
Materials required are: Cupcake liners, Pipe cleaners, White glue, Wiggle eyes (optional), Buttons and beads (optional)
Carefully spread open and flatten each cupcake liner. Fold up ½ inch or 1¼ cm from the bottom edge of the cupcake liner. This first fold defines the size of the succeeding folds. Flip the cupcake liner over. Fold up ½ inch or 1¼ cm again from the bottom. The edges of the second fold should line up nicely with the first. Continue until you’ve folded the entire cupcake liner.
Similarly fold the second cupcake liner. Fold each cupcake liner in half so that you create a middle crease. Apply glue on the middle crease of one cupcake liner. Put the two cupcake liners together, aligning them at the middle crease and at the edges.
You will need a pipe cleaner to hold the wings together and make the butterfly’s antennae as well. Fold the pipe cleaner in half. Twist the ends of the pipe cleaner around the cupcake liners’ middle crease.
Carefully open the cupcake liner folds on one side of the pipe cleaner. Repeat on the opposite side to complete the butterfly’s two pairs of wings.
Create the antennae. Decorate butterfly by gluing a button, a foam shape or a plastic gem at the center of the butterfly.
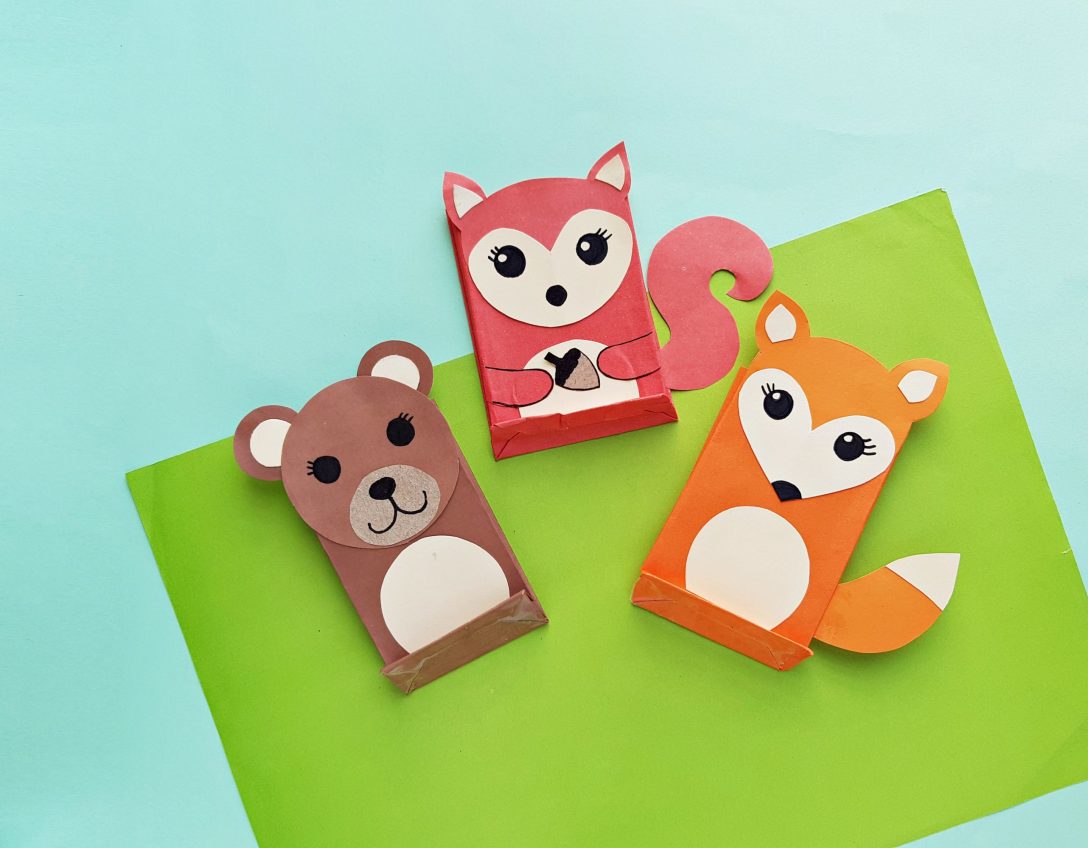
This paper craft for kids is perfect for preschoolers ready to practice their cutting and gluing skills, as well as older elementary school children! Given below are the steps courtesy of tinyhumansread.com.
Supplies you need are: Colored craft paper, Pencil, Scissors, Craft glue and Black marker.
Trace the template patterns on the selected colored papers. Cut out the traced patterns with scissors.
Glue the inner ear patterns (2 small triangular pieces) on the ear parts of the fox’s head pattern and glue the heart shaped piece on the bottom side of the head. Glue the small pattern of the tail on the tip of the big tail pattern.
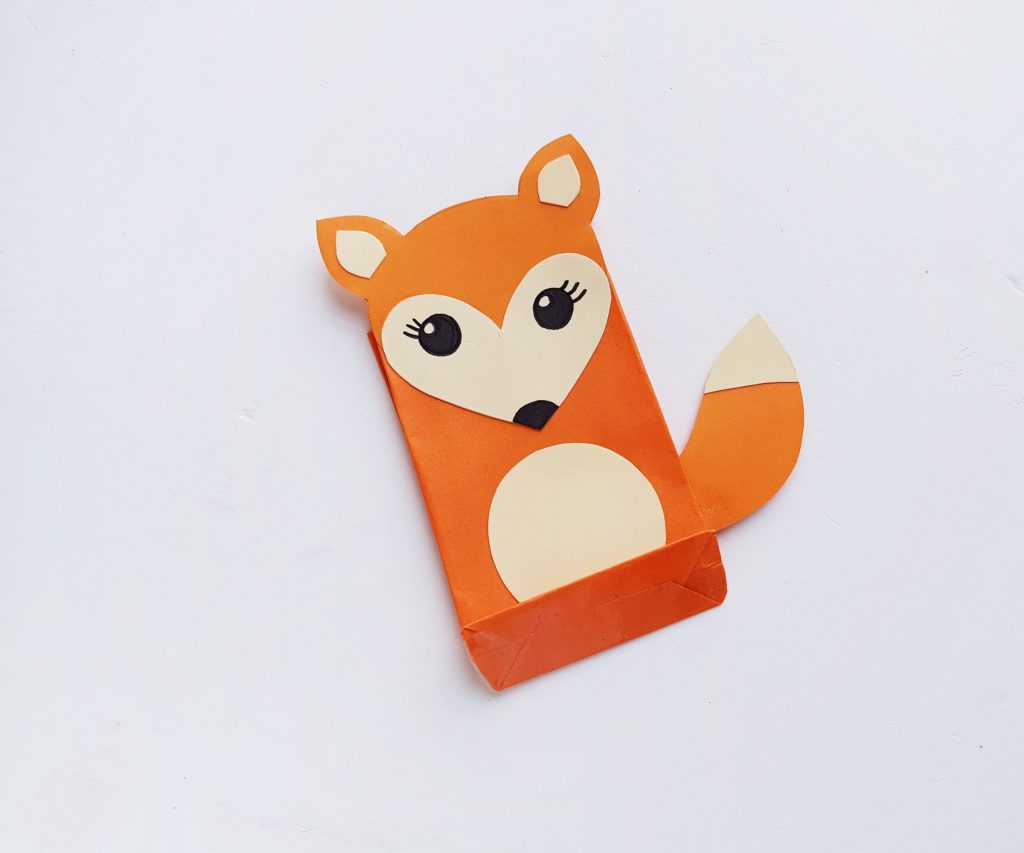
Prepare a paper bag using an 8 inches × 8 inches orange colored craft paper or any colored craft paper you prefer for the fox. You can also use a sheet of paper if you don’t want to make a paper bag fox.
Attach the belly pattern of the fox below the head (on the middle part of the bag or paper sheet). Attach the head pattern of the fox on the top side of the bag, keeping half of the head outside the bag’s top end. Attach the tail on either side of the bag, in between the side folds of the bag. Use a black sharpie to draw the eyes and nose of the fox.
Learning archery at the moment may not be possible. But you can have some fun with a bow and arrow, especially when you make it yourself! Given below are the steps courtesy of artsycraftsymom.com.
Supplies needed are: Yarn, Paper tapes in pastel colors, Washi tape in Golden color, Twigs / Nature sticks – one 12 inches and another 6 inches long., Feathers, Cardboard and Scissors.
Collect sticks that are smooth, long and flexible when you go for your nature walks. If the sticks are rough, use an adult’s help to sand it down with sandpaper and a dull knife. First, start with the bow. Take the longer stick and decorate with paper tapes / washi tapes. You can use pastel colors and left a 1 inch gap between each roll.
Using yarn, make multiple twists at one end and knot it in place. Now bend the stick into a small arc and wrap the yarn securely at the other end to form a bow. Leave some length on the string to tie the feathers.
Trace a triangle on a cardboard piece and cut it to form an arrow tip. Cover with gold washi tape. Decorate the arrow with tiny strips of washi tape again. Add diagonal strips at the bottom and secure in place to create the fletching using a glue gun if required. Fletching is the material at the end of the arrow which helps guide it as it flies.
Nock the arrow. Take a knife and cut a slit at the end without the arrowhead to make the nock. This will help the string guide the arrow. Make as many arrows as you need. Now go do some target practice in an open area!
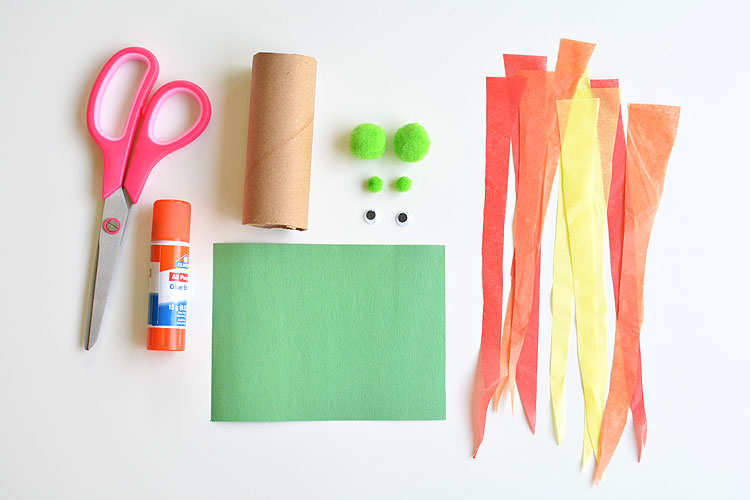
This fire breathing dragon made from a toilet paper roll is an easy kids craft that uses simple craft supplies. It is easy to make and fun to play with. When you blow into the end of the tube the tissue paper looks like flames coming out of the dragon’s mouth. Below are the steps courtesy of onelittleproject.com.
Materials required are Scissors, Glue Stick, Glue Gun, Paper roll, Construction Paper, 2 Medium Pom Poms, 2 Small Pom Poms, 2 Medium Googly Eyes, Red, Yellow, and Orange Tissue Paper.
Cut a piece of construction paper to be the exact length of your paper roll. Spread glue from a glue stick onto one side of the paper. Line up the ends of the paper with the ends of the paper roll, then wrap the paper around the roll so it’s completely covered.
Using a glue gun or glue dots, attach one of the googly eyes to the middle of one of the larger pom poms. Repeat for the second googly eye and second larger pom poms. Using a glue gun or glue dots, attach each of the dragon eyes to one end of the paper roll and the two smaller pom poms near the other end of the paper tube to make the dragon’s nose.
For the fire, cut scraps of red, yellow, and orange tissue paper to belong pointy strips, about 9″ or 10″ long. Spread some glue from a glue stick onto the straight end of one of the strips of tissue paper, then attach it to the inside of the paper roll under the dragon’s nose.
Repeat and keep gluing tissue paper to the inside of the paper roll as you work your way around the roll. Your paper roll dragon is complete! Take a deep breath, put your mouth on the end of the paper roll and BLOW!