Easy DIY Craft: 3D Paper Kite

The 3D effect of the kite popping off the page combined with the variety of colors makes this a gorgeous craft to display at home or school for others to admire. Following are the steps courtesy of fun365.orientaltrading.com.

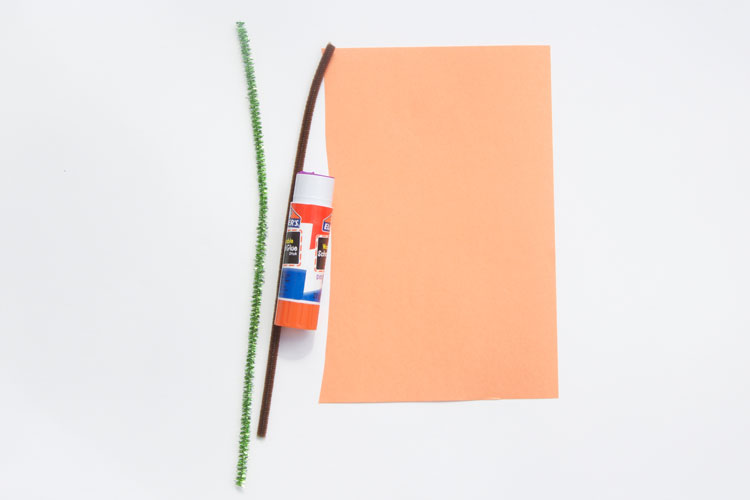
Materials required are: Full Color Spectrum Paper Pack, Elmer’s Tacky Glue, Twines, Scissors.

Cut out the kite shape using a template. Use it as a pattern and trace the shape five times on colored cardstock. Cut out each of the traced kite shapes. Then fold each of them in half length-wise.

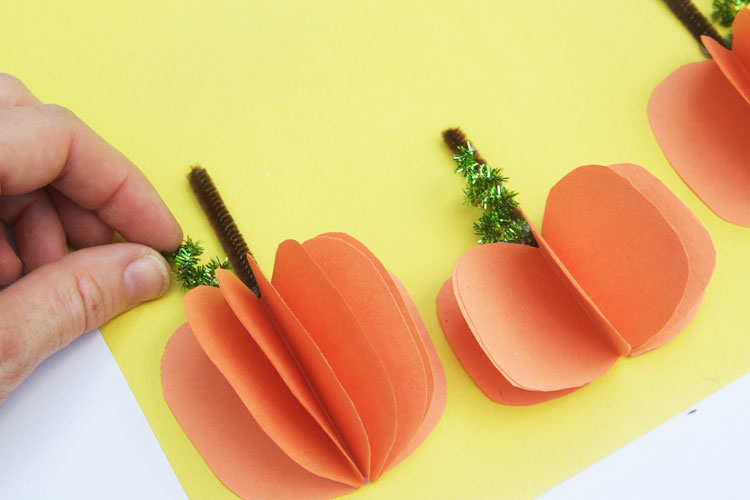
Using an extra strength glue stick, add glue to one-half of one of the kites. Line up and place another kite half on the glue to attach them together. Repeat this step four more times to glue each of the kites together. After each of the kites are glued together, you will have a 3D kite shape.

Cut out six small triangle shapes from your cardstock paper scraps for kite string bows. Set them aside. Add glue on the back of the 3D kite shape and glue it at the top corner of a piece of blue cardstock.

Cut a length of baker’s twine about 8-inches long. Add a line of tacky glue running from the bottom of the 3D kite to the bottom of your blue cardstock. Place your baker’s twine on the line of glue. Cut off any excess twine that hangs off the bottom of your cardstock. Use a glue stick to glue each of the small triangle pieces along the baker’s twine kite string to look like bows.

Cut out a few clouds from white cardstock. Then glue them on your blue cardstock on the sides of your 3D Kite Craft. Allow the glue on your paper craft to dry completely before handling your craft. This colorful paper craft will look stunning hung on display.

Easy DIY craft: 3D Paper Tree

A three-dimensional paper tree using printable tree templates will be a wonderful craft for kids. Below are the steps courtesy of firstpalette.com.

Supplies needed are: Brown card-stock (medium to heavy weight), Light weight green paper or paper in fall colors (red, yellow, orange), Scoring tool ( blunt plastic knife, spent ballpoint pen), Scissors, Glue, Ruler.

Print out the tree trunk templates on brown A4 or Letter size cardstock to come up with four identical trees.

Glue the template pieces. Score along the middle line. Fold each tree in half. Glue the first pair of trees together. Glue the second pair of trees together. Two sections of 3D tree trunk is ready.

Glue both paper tree pairs together, aligning them along the edges.

Cut a strip of paper. The strip’s width defines the leaf width. Fold the strip in half several times until the folded height is about the desired leaf length. Fold the paper lengthwise in half. Cut a half-leaf shape along the folded edge.

Unfold the paper to reveal several leaves. Make enough leaves to cover your tree. Finally, glue the leaves on the tree branches.

Easy DIY Crafts: 3D Paper Pumpkins Card

This 3D Paper Pumpkins craft is so fun! And it’s ridiculously simple to make. Below are the steps courtesy of onelittleproject.com.

This image has an empty alt attribute; its file name is pumkin-material.jpg

Materials you need: Construction Paper, Brown Pipe Cleaners, Green Pipe Cleaners, Glue Stick, and Glue Gun

This image has an empty alt attribute; its file name is pumkin-craft1.jpg

Fold your paper in half and cut out half of a pumpkin shape. Cut atleast 6-8 piece per pumkin. Keep Repeating this process until you have all of your shapes

This image has an empty alt attribute; its file name is pumkincraft2.jpg

Apply glue to one of the folded shapes. Place another folded piece on top of the glued side, matching up the shapes exactly.

This image has an empty alt attribute; its file name is pumkincraft3.jpg

Repeat the process until you have all of the shapes attached and the pumpkin resembles an accordion. Glue the 3D pumpkin to a piece of construction paper.

This image has an empty alt attribute; its file name is pumkin-craft4.jpg

Use a hot glue gun to attach a stem and a vine with pipe cleaners. To make the vine, wrap a pipe cleaner around a pencil. Your 3D pumkin card is ready.