Easy DIY Crafts: Glitterball Yarn Ornaments

If you are looking for crafts to make your house look shiny, glitterball yarn ornaments are your best choice. Following are the steps to make one courtesy of onelittleproject.com

Materials needed are balloons, cotton yarn, thick glue, iridescent glitter, plastic fork, disposable bowl, scissors.

Cut around 15 to 20 pieces (2.5ft long) of yarn per ball ornament. The more yarn you use, the better your ornament will look. Mix your glue, water, and glitter in the disposal bowl. You can blow a balloon up and slowly let the air escape still you reach the right size. Hang the balloon on a kitchen cupboard or light holder above the dining table.

Now going to the messy and fun part, add one strain of yarn into the bowl of glue and sink it fully into the bowl and stir using the plastic fork. Find the end of the yarn, then run it through the fork as shown in the picture. Forks work so well to remove the excess glue. Carefully wrap the strain of yarn around the balloon and when you reach the end of the yarn, sink the next set of yarn into the bowl.

When you finish wrapping a strand of yarn, make sure you tuck the end under another piece of yarn so that it doesn’t fall down when you let go of it. Keep adding more glue-covered yarn in different directions until you are happy. You can leave the yarn ball hanging overnight to dry. Then make a small cut in the balloon, very close to the knot. When the balloon is deflated, you can pull it out from the yarn ball.

Tie a piece of string around the yarn, and the ball ornament is complete. You can make the glitterball yarn in various colors by using different colors of cotton yarn and matching color glitter.

Easy DIY Crafts: Heart Garland Craft

Whether it is the Valentines Season or not, this is a craft that you can easily make at home. The following are steps courtesy of diyinspired.com

Materials needed are Paper scraps, Old book pages, paper cutter, double-sided tape, felt craft bird, ribbon, and hot glue.

Cut several strips (one inch wide) of paper and book pages in three different lengths (6”, 7” and 8”). Fold each strip in half. Take a small narrow piece of double-sided tape, bend the curve of the heart in and tape the ends together which naturally form a heart shape.

Layer the large (paper scraps) and small hearts (book pages), attaching them with double-sided tape. Punch a hole into the last two hearts, and tie the ribbon to it.

Attach the hearts together with tape

The garland is fragile, but it will hold up for a month or longer. Enjoy making heart garland.

Easy DIY Crafts: Photo Card

This beautiful Photo card is deceptively simple to make and is perfect for Anniversary gifts. The following are steps courtesy of diyinspired.com

Materials needed are Pictures, Black Card Stock, Pencil, Ruler, Hole Punch, Ribbon, Scissors, Double Sided Tape, and Ring Box.

Determine the width of your paper by measuring your ring box.  Mark every two inches and fold to make squares. That will fit five 1.7” photos on each side.

Punch two holes and tie a bow with some ribbon in remaining left over inch.  Tape your photos on each side of the accordion using double sided tape.

Fold them up and place it inside your ring box so that when box opened photo can be taken out as chain.

You can even change it up a bit and put text in some of the squares to turn it into a beautiful party invitation. Enjoy making photo cards.

Easy DIY craft: Candy Corn Craft

This is a great candy corn craft for kids, simple to make and you probably already have all of these supplies around your house. Given below are the steps courtesy of aboutamom.com.

Materials needed are Craft sticks, Orange-yellow and white card stock, Orange-yellow-white acrylic craft paint, glue,and Scissors.

Lay out a piece of scrap newspaper and Glue three craft sticks together to make a triangle shape and let dry.

Determine which will be the top point and paint the top 1/3 of the triangle white. Paint the center 1/3 orange and the bottom 1/3 yellow and let dry.

Trace the outside of the triangle onto a piece of orange, yellow and white cardstock and cut out with scissors. Glue cardstock according to colours of sticks.

Glue the paper candy corn to the back of the craft stick candy corn. Your candy corn craft is ready.

Easy DIY Crafts: Felt Pizza Bookmark

Felt Pizza bookmark is deceptively simple to make! This simple no sew felt craft is perfect bookmark for the readers that love pizzas. The following are steps courtesy of diyinspired.com

Materials needed are Scissors, felt, hot glue and glue gun.

You will need tan, red, cream, and green colored felt. Take tan felt and fold into half.  Fold over the corner to form a triangular pizza slice.

Cut out the slice leaving the fold intact and hot glue the side with the crust.

Cut the red felt in a triangle form to fill in the pizza crust as sauce. Then cut the cream coloured felt in a triangle form to fill in the pizza crust as cheese. Cut a scalloped edge for cheese felt. Cut small green rectangle and red circle.

Glue and assemble all the pieces together to make it look like a pizza.

Flap open the bottom part of pizza slide over the page and use it as a page marker. The felt pizza bookmark is ready and enjoy using it while reading your favourite book.

Easy DIY Crafts: 3D Paper Pumpkins Card

This 3D Paper Pumpkins craft is so fun! And it’s ridiculously simple to make. Below are the steps courtesy of onelittleproject.com.

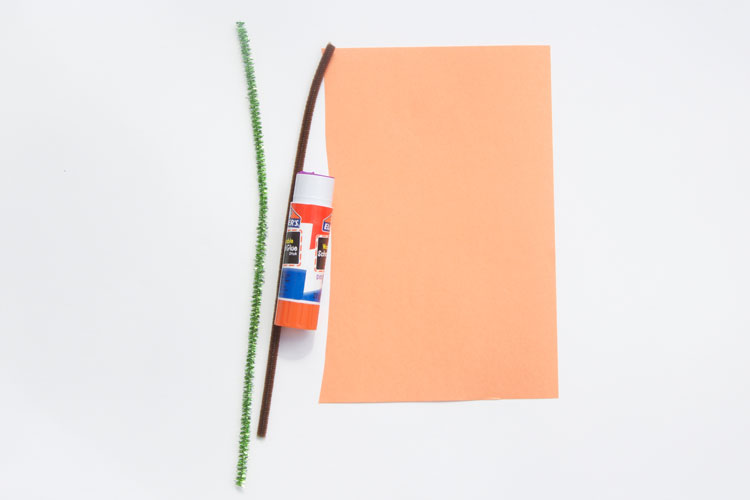
This image has an empty alt attribute; its file name is pumkin-material.jpg

Materials you need: Construction Paper, Brown Pipe Cleaners, Green Pipe Cleaners, Glue Stick, and Glue Gun

This image has an empty alt attribute; its file name is pumkin-craft1.jpg

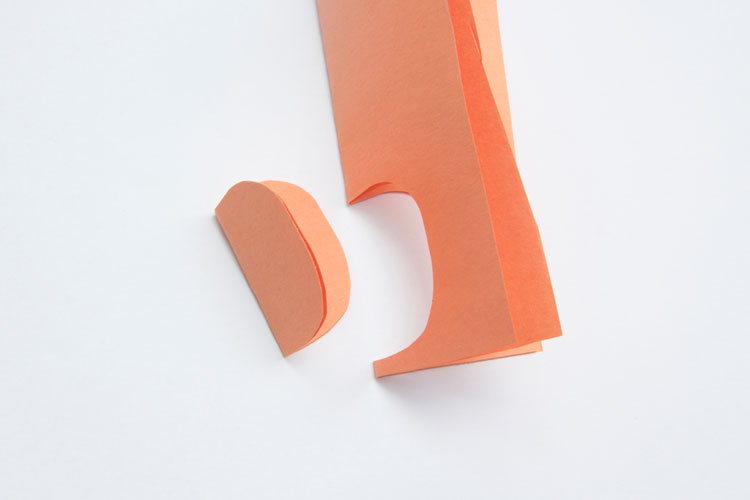
Fold your paper in half and cut out half of a pumpkin shape. Cut atleast 6-8 piece per pumkin. Keep Repeating this process until you have all of your shapes

This image has an empty alt attribute; its file name is pumkincraft2.jpg

Apply glue to one of the folded shapes. Place another folded piece on top of the glued side, matching up the shapes exactly.

This image has an empty alt attribute; its file name is pumkincraft3.jpg

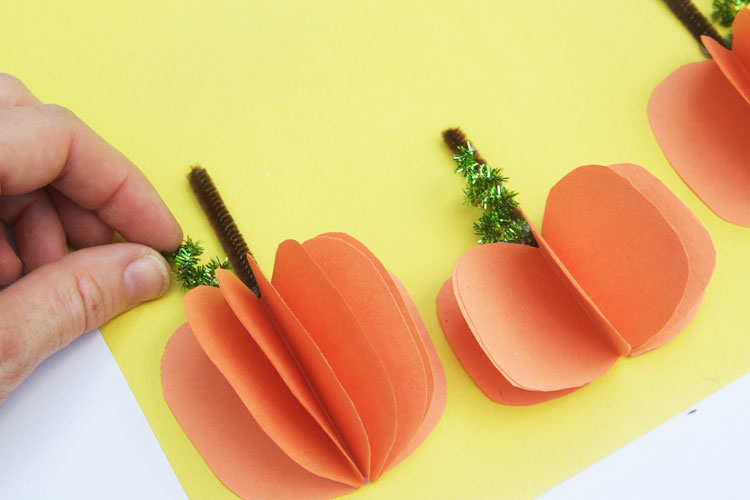
Repeat the process until you have all of the shapes attached and the pumpkin resembles an accordion. Glue the 3D pumpkin to a piece of construction paper.

This image has an empty alt attribute; its file name is pumkin-craft4.jpg

Use a hot glue gun to attach a stem and a vine with pipe cleaners. To make the vine, wrap a pipe cleaner around a pencil. Your 3D pumkin card is ready.